How To Measure & Photograph For Your Design Kit
Follow the instructions below to measure and photograph your room. It takes about 15 minutes per room, you’ll need a measuring tape, pencil, paper and your phone.
Step 1 - Drawing the Floorplan:
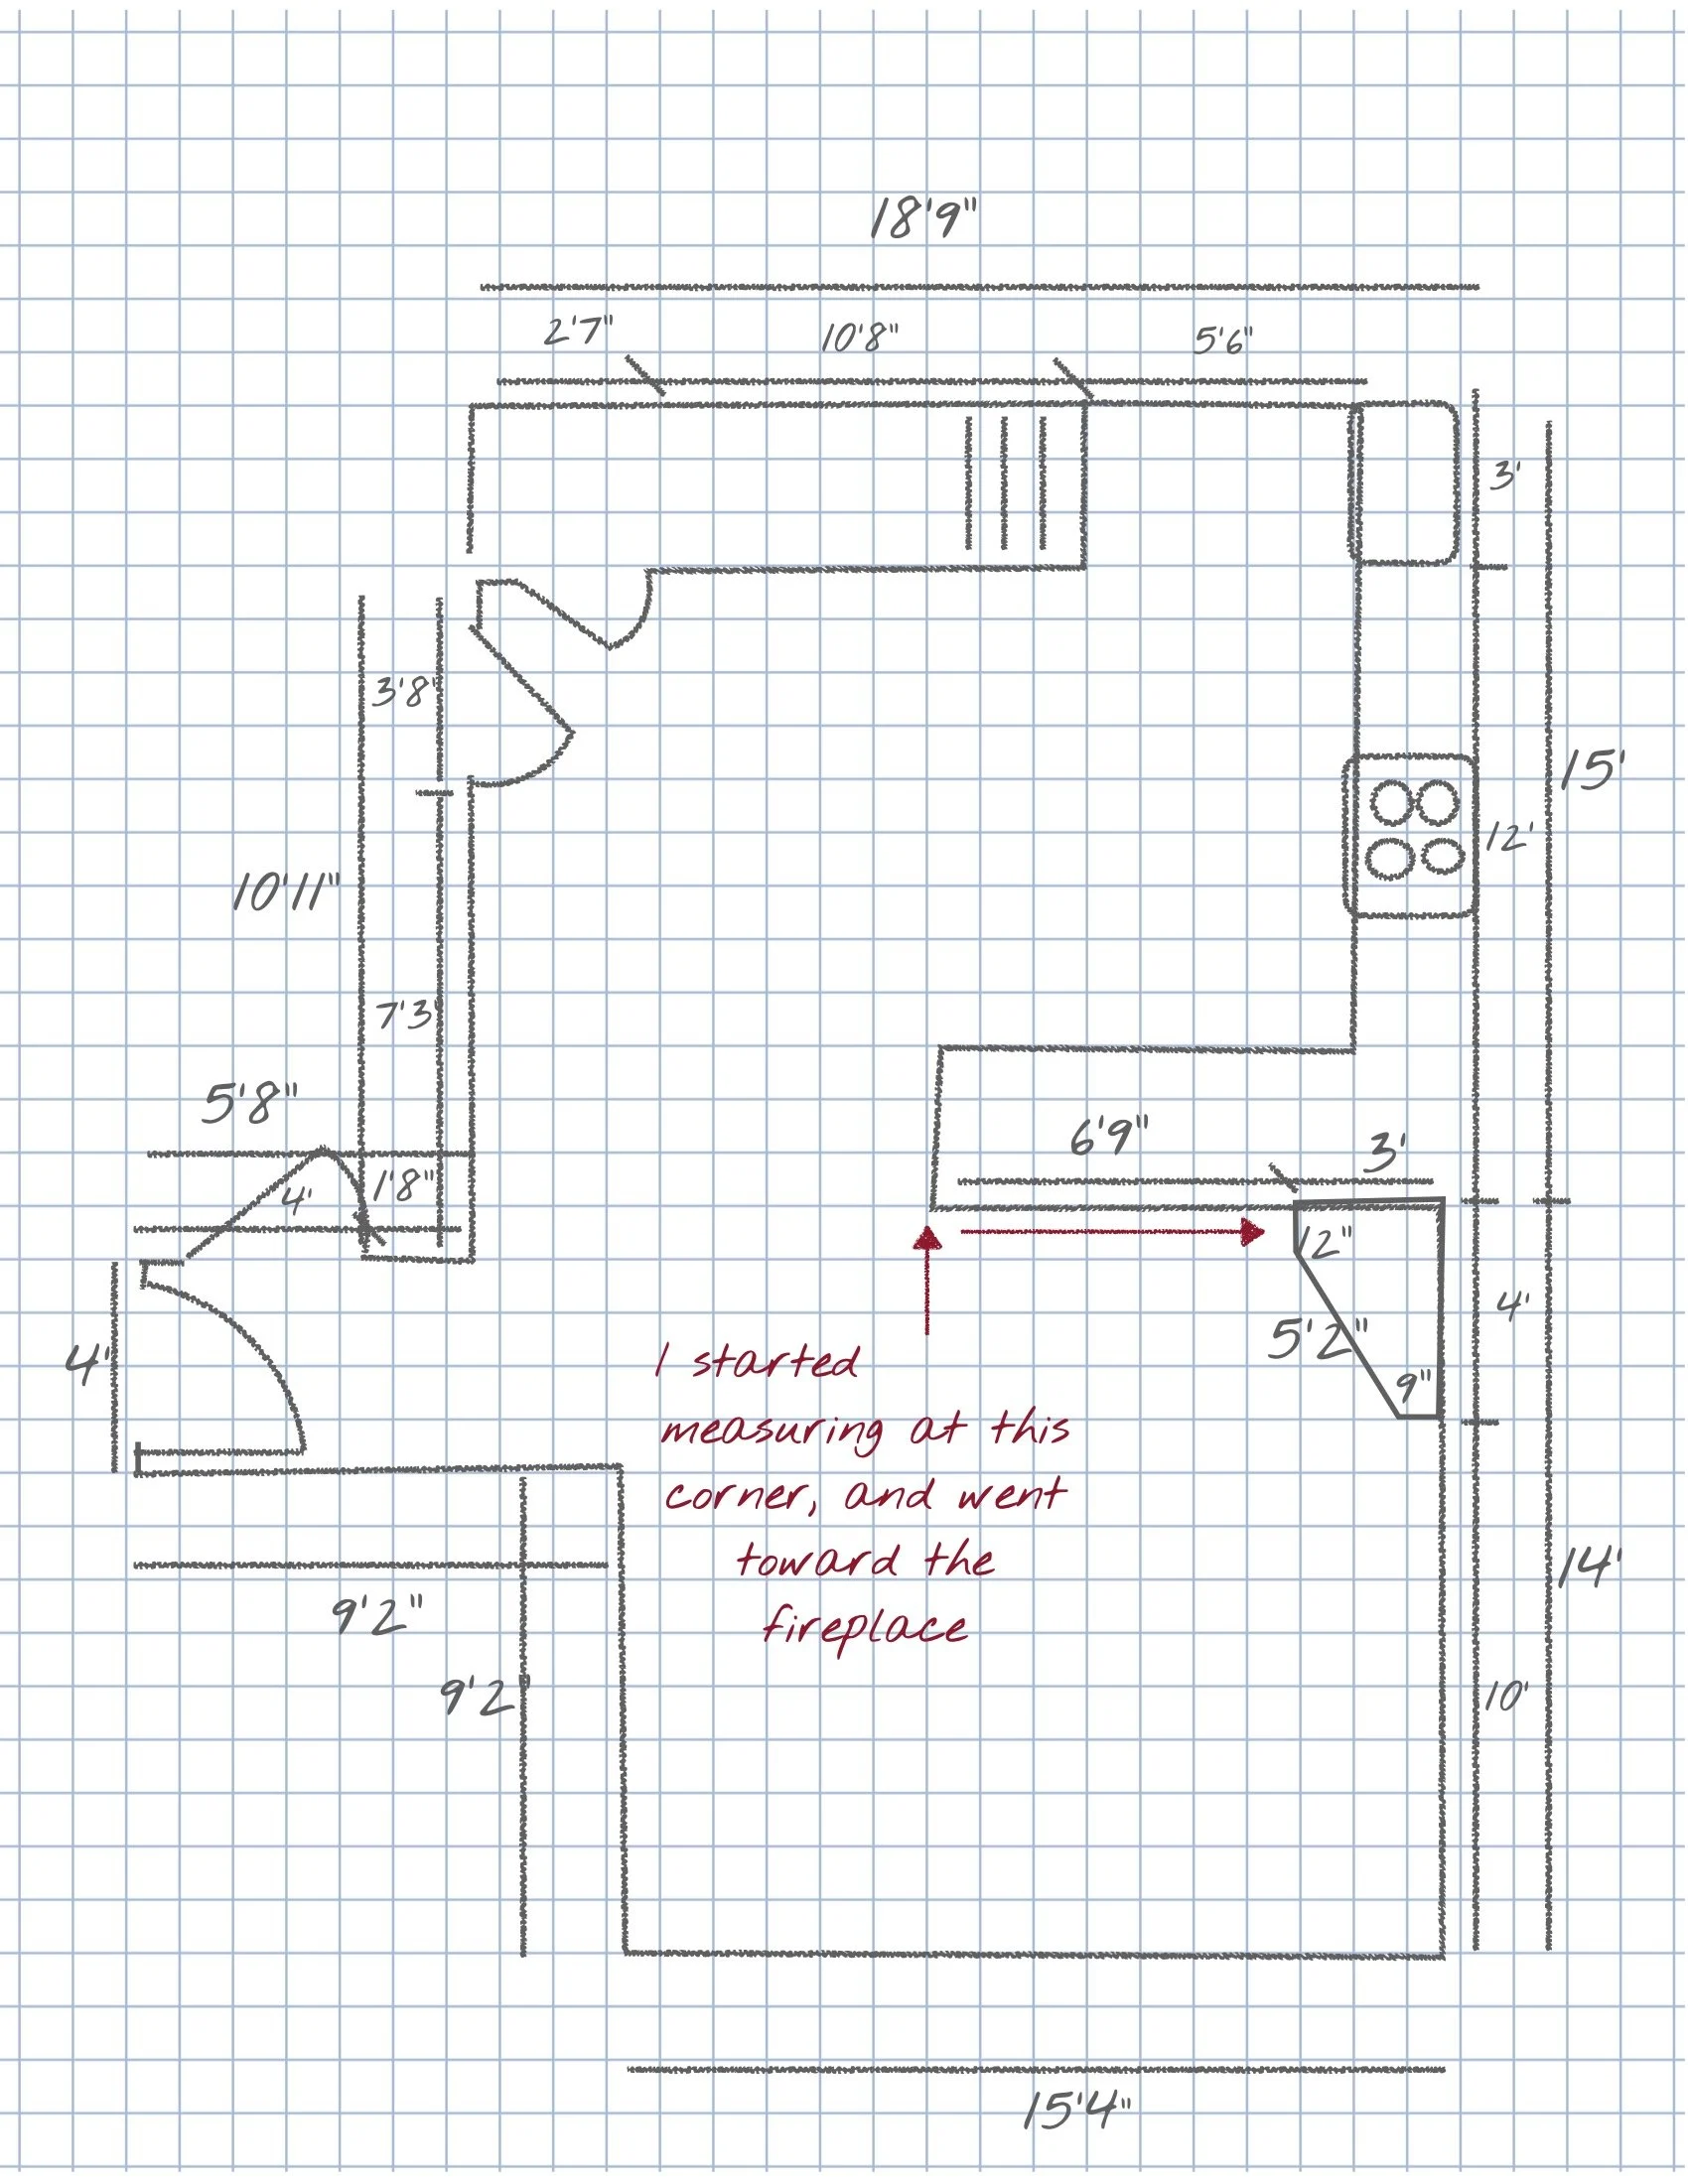
Sketch the shape of the room using a pencil & paper. It doesn’t need to be to scale, but drawing on graph paper does make it pretty easy!
If multiple connecting rooms are to be designed, please show how these rooms connect and measure on one sheet of paper.
Measure the entire length of each wall, corner-to-corner (ignoring doors, openings and windows - we’ll get to those next) and mark this on the floor plan in either inches or feet/inches - just pick one and be consistent throughout.
Step 2 - Overall Measurements:
Once the entire length of each wall has been measured and recorded, measure each wall in detail.
Start in the corner, measure the distance to the casing of the first window, door, opening and mark on the drawing. Include how high each window casing is from floor.
Next, measure the width of the window (include casings) and mark on the drawing.
Measure all items on entire length of each wall.
Items of importance to include: Doors, windows, built-ins, fireplaces - anything that could impact the placement of furniture.
Repeat steps for each wall in each room.
Note the height of the floor to ceiling, and floor to any moldings.
And Double Check:
That you have total room width and lengths (ie 14’ x 15’4 across the middle of the room), not just the smaller measurements that total to the larger number.
Step 3 - Final Touches
Add locations of anything on the wall and floor - light switches, electrical outlets, thermostats, electrical panels, air returns, etc.
Label all rooms.
Step 4 - Photographs
Take photos during the day.
Remove clutter.
Start in one corner and work your way around the room taking a photo while standing in each corner and middle of each wall (indicated by red “x”).
Capture part of the floor and ceiling in each photo.
Number each photo and label to the corresponding place on the flooplan from which it was taken.
Take a photo of any furniture you want to keep in the room and submit that with full measurements of each piece.
Step 5 - Submit Email With:
Your Measurements
Room Photos
Link to Inspiration Board (Pinterest, Houzz, etc)
Another alternative to email is to photograph your sketched measurements and set up a Shared Album on iPhoto, sharing your photographs and measurements there. If this is done, just make sure each room photograph is labeled to its corresponding wall.


